
How I Improved My Lighthouse Score from 72 to 100
Performance has always been something I cared about, but it wasn't until I started polishing my personal website that I decided to take a closer look at my Lighthouse scores.
At first, I wasn't aiming for a perfect score. I simply wanted a faster website and a better experience for visitors.
When I ran Lighthouse for the first time, my Performance score was 72.
That wasn't terrible, but I knew there was room for improvement.
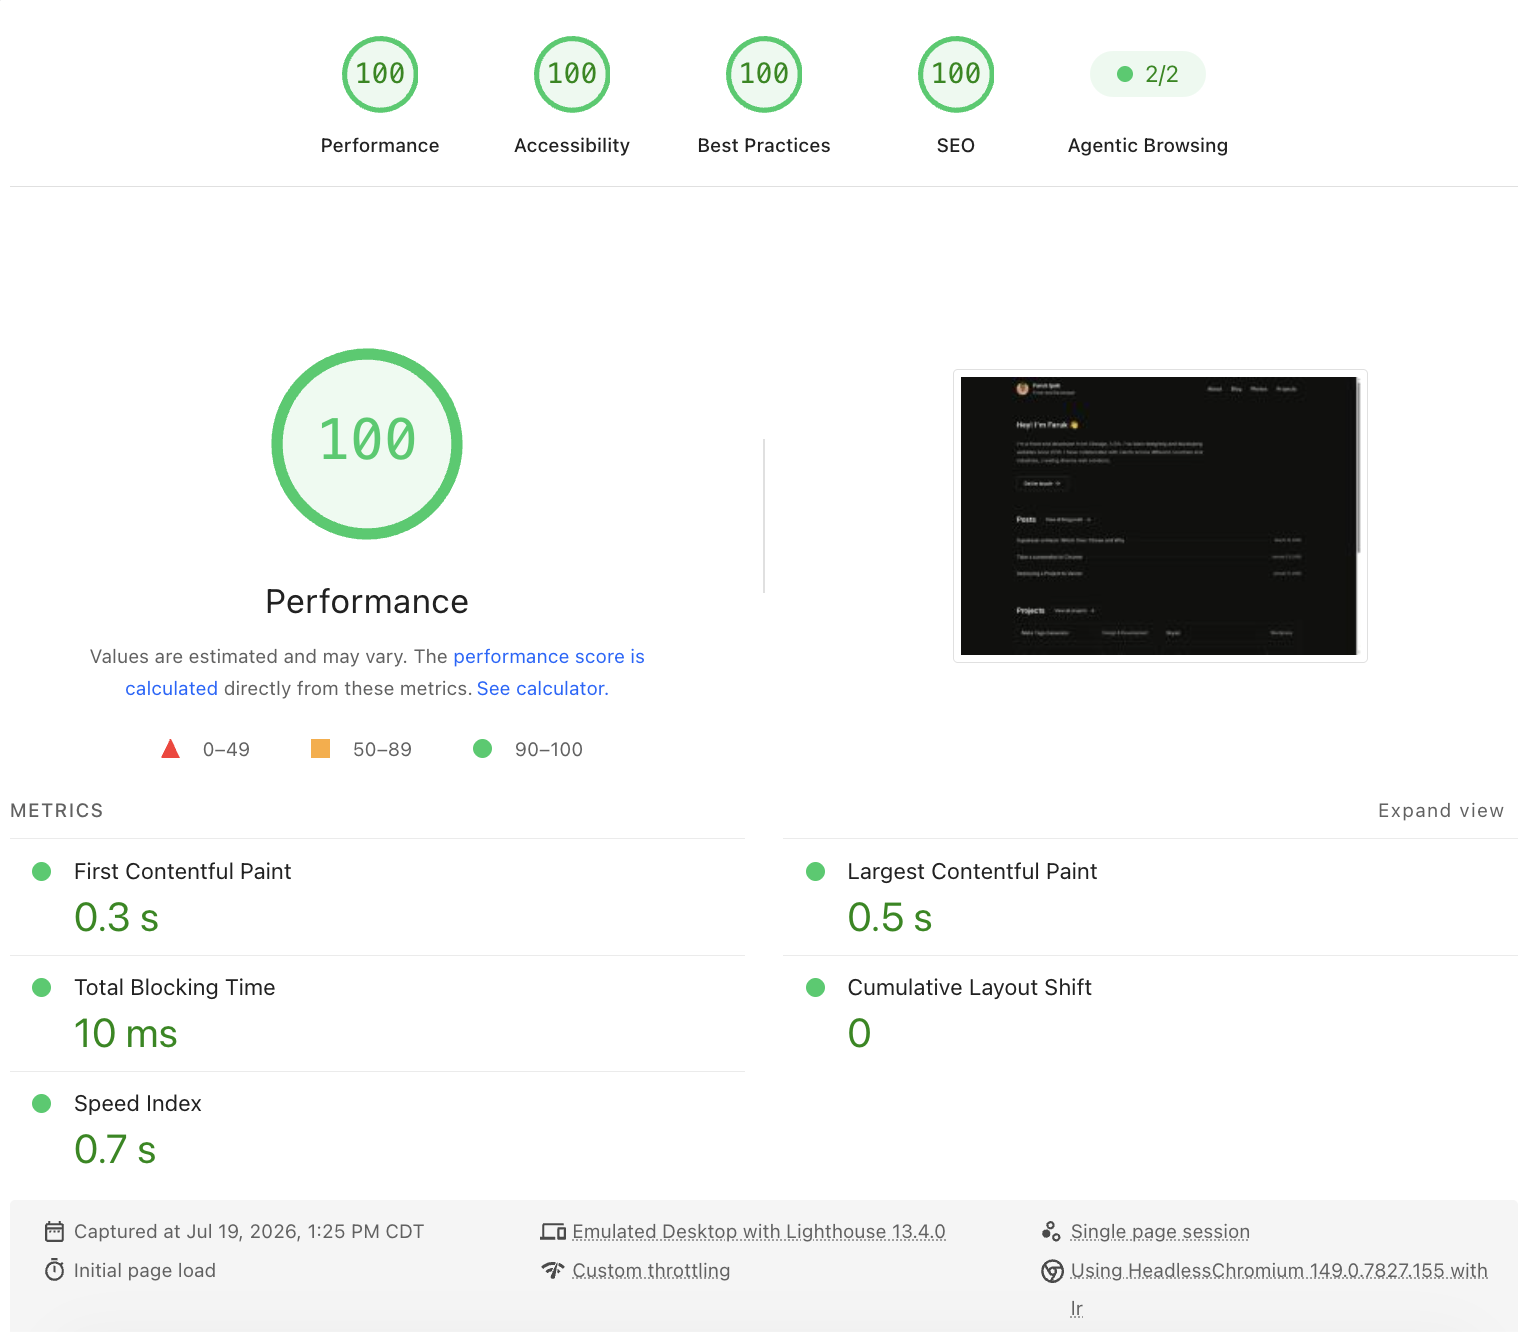
After spending some time analyzing the report and making small improvements one by one, I eventually reached a 100 Performance score.
In this article, I'll walk through the changes I made and explain why each one mattered.
What Actually Improved?
A Lighthouse score is just a summary. These are the metrics that really matter.
Metric | Before | After | Why it matters |
|---|---|---|---|
First Contentful Paint | 2.7s | 0.3s | First visible content appears sooner. |
Largest Contentful Paint | 2.8s | 0.5s | Main content loads much faster. |
Speed Index | 2.3s | 0.7s | Overall visual loading speed improved. |
Total Blocking Time | 480ms | 10ms | JavaScript no longer blocks user interaction. |
Cumulative Layout Shift | 0.24 | 0.00 | No unexpected layout movement while loading. |
Starting Point
My website is built with Next.js, and I expected it to perform well out of the box.
However, Lighthouse quickly pointed out several issues:
Images were larger than necessary.
Some JavaScript wasn't needed immediately.
Fonts were blocking rendering.
Third-party scripts affected loading time.
A few components were rendering more than they needed to.
None of these problems were huge individually, but together they had a noticeable impact.
1. Optimizing Images
Images are often one of the biggest performance bottlenecks. Instead of using regular <img> tags everywhere, I switched to Next.js' Image component.
This gave me several benefits automatically:
Responsive image sizes
Lazy loading
Modern image formats when supported
Better caching
I also compressed large images before uploading them. This alone reduced the amount of data visitors needed to download.
2. Loading Less JavaScript
Not every component needs to be loaded immediately. For sections that weren't visible right away, I used dynamic imports so they loaded only when needed. Instead of sending everything on the initial page load, the browser could focus on rendering the most important content first. Reducing unnecessary JavaScript had a noticeable effect on Lighthouse.
3. Optimizing Fonts
I discovered that custom fonts were delaying the first render. Using Next.js font optimization allowed the fonts to be self-hosted and loaded more efficiently. This reduced layout shifts and improved the overall loading experience.
4. Removing Unnecessary Client Components
One thing I learned while working with the App Router was that not every component needs to be a Client Component. Whenever possible, I converted components into Server Components. This reduced the amount of JavaScript sent to the browser and made pages load faster. It's an easy optimization to overlook, especially when building new features quickly.
5. Fixing Layout Shift (CLS)
Nothing feels worse than trying to click a button while the page suddenly moves. Lighthouse highlighted several layout shifts caused by images and dynamically loaded content.
I fixed these by:
Defining image dimensions
Reserving space for dynamic content
Avoiding unexpected UI changes during loading
The page immediately felt more stable.
6. Paying Attention to Third-Party Scripts
Analytics, chat widgets, and other third-party scripts can significantly affect performance.
I reviewed every external script on my website and asked a simple question:
Does this really need to load immediately?
Anything that wasn't critical was deferred or removed entirely. Sometimes the fastest code is the code you don't ship.
7. Running Lighthouse After Every Change
One thing that surprised me was how helpful Lighthouse became once I stopped treating it like a final exam. Instead of checking my score only after everything was finished, I ran Lighthouse after nearly every meaningful change. That made it much easier to understand which optimization actually improved performance.
8. Real Code Examples
Using next/image
//Before
<img src="/hero.png" alt="Hero" />

//After
import Image from "next/image";
<Image
  src="/hero.png"
  alt="Hero"
  width={1200}
  height={700}
  priority
/>
Why it helped
Automatic image optimization
Responsive image sizes
Lazy loading (unless
priorityis used)Modern image formats when supported
Using next/font
//Before
<link
  href="https://fonts.googleapis.com/css2?family=Inter"
  rel="stylesheet"
/>

//After
import { Inter } from "next/font/google";

const inter = Inter({
  subsets: ["latin"],
});
Why it helped
Next.js self-hosts the font and optimizes loading, reducing render-blocking requests and helping improve Core Web Vitals.
Server Components
//Before
"use client";

export default function Hero() {
  return <section>...</section>;
}

//After
export default function Hero() {
  return <section>...</section>;
}
Why it helped
Removing "use client" from components that don't need client-side interactivity reduces the amount of JavaScript sent to the browser.
The Result
After making these improvements, my Performance score increased from 72 to 100.
More importantly, the website actually felt faster.
Pages loaded more quickly, interactions were smoother, and the overall experience improved—not just the score.
What I Learned
Getting a perfect Lighthouse score isn't about chasing a number. It's about building a website that's fast, responsive, and enjoyable to use. Many of the improvements were surprisingly small on their own, but together they made a significant difference.
If you're building a Next.js application, I'd recommend running Lighthouse early in your project instead of waiting until the end. You'll catch issues sooner, develop better habits, and spend far less time fixing performance problems later.
Next.js Performance Checklist
Before deploying your project, I usually go through this list:
✅ Use
next/imagefor all images.✅ Optimize and compress large assets.
✅ Use
next/fontinstead of loading fonts manually.✅ Remove unnecessary
"use client"directives.✅ Prefer Server Components whenever possible.
✅ Dynamically import heavy components.
✅ Avoid loading unnecessary third-party scripts.
✅ Define image dimensions to prevent layout shifts.
✅ Run Lighthouse after every significant change.
✅ Test on mobile, not just desktop.
✅ Check Core Web Vitals in production.
✅ Review your bundle size regularly.
Following this checklist has become part of my development workflow and helps me catch performance issues before they reach production.
Final Thoughts
One thing I learned from this process is that performance isn't usually improved by a single big change. It's the result of many small decisions that add up over time.
Lighthouse helped me identify those opportunities, but the real benefit wasn't achieving a score of 100—it was building a website that feels faster and provides a better experience for visitors.
Today, I don't wait until the end of a project to think about performance. I check Lighthouse throughout development, fix issues as they appear, and treat performance as a feature rather than an afterthought.